
finger loom instructions
A finger loom is a versatile tool for creating woven projects like bracelets, scarves, and home decor. It’s portable, easy to use, and perfect for beginners or experienced crafters. This guide will walk you through setting up, basic techniques, and advanced patterns to help you master finger looming. Whether you’re a hobbyist or a professional, this resource will inspire you to explore the creative possibilities of finger looming.
What is a Finger Loom?
A finger loom is a small, portable weaving tool used to create various woven projects, from simple bracelets to complex designs. It’s ideal for crafters of all skill levels, allowing for versatility and creativity in making decorative items or accessories. The tool is typically handheld and operated using fingers, making it easy to use anywhere. With instructional videos and community support available, finger looming has become a popular activity within crafting communities, offering both beginners and experienced crafters the opportunity to explore their creativity through weaving.
Why Use a Finger Loom?
A finger loom is an excellent choice for crafters due to its portability and ease of use. It requires minimal setup, making it ideal for projects on the go. The tool is perfect for beginners, as it simplifies the weaving process, allowing you to focus on creativity rather than complex techniques. Experienced crafters also appreciate its versatility in creating intricate designs and patterns. Unlike larger looms, a finger loom is compact and affordable, making it accessible to everyone. It’s a great way to explore weaving without committing to expensive equipment. Additionally, it’s a relaxing and rewarding hobby that produces beautiful, handmade items for personal use or as gifts. The finger loom’s simplicity and versatility make it a favorite among craft enthusiasts of all skill levels.
Basic Tools and Materials Needed
To get started with finger looming, you’ll need a few essential tools and materials. First, you’ll need a finger loom, which is typically small and portable. Yarn or thread is the primary material for weaving, and you can choose from a variety of colors and textures. A pair of scissors is necessary for cutting the yarn as you work. A tapestry needle is also helpful for weaving in ends and securing loose threads. Additionally, a measuring tape or yarn gauge can be useful for maintaining consistent tension. Optional items include beads for embellishments or embroidery floss for added detail. These basic tools and materials are easy to find and will help you create beautiful woven projects with ease.

Setting Up Your Finger Loom
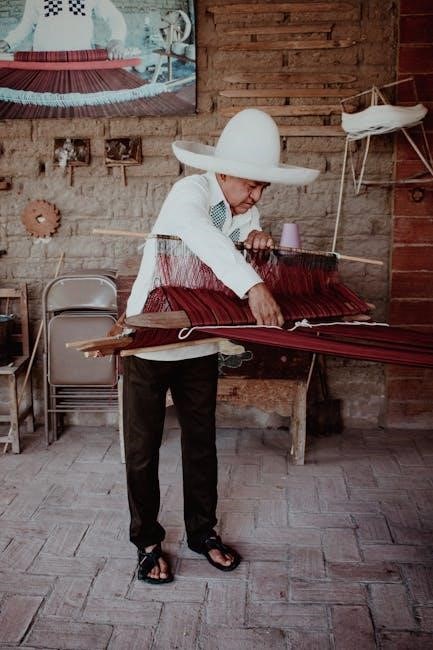
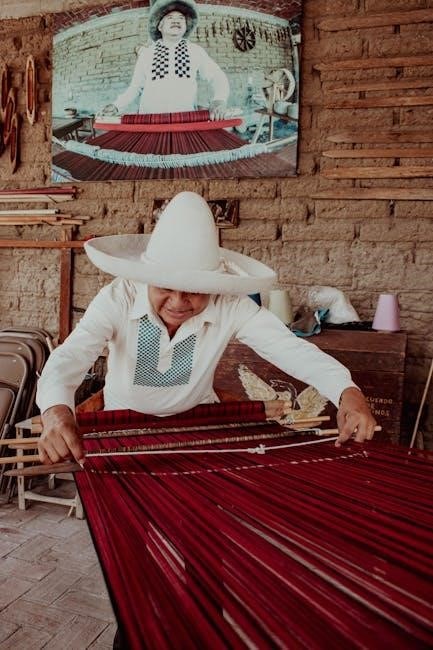
Setting up your finger loom involves securing the warp threads and adjusting the tension for even weaving. Follow these steps to prepare your loom properly.
Preparing the Loom for Weaving
Before starting your project, ensure your finger loom is clean and free of debris. Align the pegs evenly and secure the frame if it’s adjustable. For warping, attach the yarn to the first peg and wrap it around the loom in the desired pattern, maintaining consistent tension. Use a measuring tool or guide to ensure even spacing between warp threads. If your loom has movable parts, lock them in place to prevent shifting during weaving. Double-check for any damaged or loose pegs that could disrupt the process. Once the warp is set, trim excess yarn and tuck loose ends neatly. Finally, test the setup by weaving a small sample to ensure everything is secure and evenly spaced.

Understanding the Warp and Weft
The warp refers to the vertical threads stretched across the loom, while the weft is the horizontal yarn woven through them. The warp provides the foundation, and the weft creates the design and texture. Proper alignment and tension of both are essential for a balanced fabric. The warp threads should be evenly spaced and taut, while the weft is woven over and under them in a specific pattern. The angle at which the weft crosses the warp affects the tightness and drape of the finished piece. Understanding how warp and weft interact is fundamental to achieving the desired weave structure. Always ensure the warp is secure before adding the weft to maintain consistency and avoid misalignment.
Setting the Tension for Even Weaving
Setting the correct tension is crucial for achieving even weaving on a finger loom. Begin by stretching the warp threads taut but not overly tight, ensuring they are evenly spaced. If the tension is too loose, the fabric may sag; if too tight, it may pucker. Gently pull each warp thread to check its tautness and adjust as needed. The weft yarn should be woven with a consistent tension, neither too slack nor too taut, to maintain a balanced weave. Use a pick or fork to gently press the weft into place, ensuring even spacing between rows. Proper tension ensures a smooth, professional finish and prevents unevenness in the final piece. Always double-check the tension before starting a new row for the best results.
Basic Weaving Techniques
Master essential weaving techniques to create stunning patterns and designs. Start with simple stitches, progress to twill, and explore herringbone for unique textures and visual interest.
The Simple Stitch
The simple stitch is the foundation of finger looming, creating a straightforward and repetitive pattern. Begin by securing your warp threads and inserting the weft yarn. Bring the yarn over the first warp, then under the next, repeating this process. This creates a basic weave. For consistency, maintain even tension to prevent loose or tight sections. Once the row is complete, gently pull the yarn to secure it. Repeat the process for subsequent rows, ensuring each stitch aligns evenly. This stitch is ideal for beginners, as it teaches the fundamental motion of weaving. Practice this technique to build confidence before exploring more complex patterns like the twill or herringbone designs. Mastering the simple stitch is essential for achieving professional-looking results in your finger looming projects.
The Twill Stitch
The twill stitch is a popular weaving pattern that creates a diagonal texture, adding visual interest to your projects. To start, secure your warp threads as usual. Begin by passing the weft yarn over the first warp thread, then under the second, over the third, and continue this over-under pattern. On the next row, shift the starting point by one warp thread to create the diagonal effect. Maintain even tension to ensure the fabric lies flat and the stitches align neatly. This stitch is slightly more complex than the simple stitch but still accessible for those with basic experience. With practice, the twill stitch will become a favorite for its dynamic and elegant appearance in scarves, belts, or home decor items. It’s a great intermediate step before exploring more intricate designs.
The Herringbone Pattern
The herringbone pattern is a reversible design that creates a chevron-like texture, perfect for adding visual interest to your finger loom projects. To achieve this pattern, start by securing your warp threads tightly. Begin weaving by crossing the weft yarn over the first warp thread, then under the second, over the third, and continue this alternating sequence. On the next row, reverse the pattern by starting under the first warp thread, over the second, and so on. This creates the distinctive zigzag effect. Keep the tension even to ensure the fabric remains flat and the stitches align properly. The herringbone pattern is versatile and works well for scarves, belts, and other decorative items. With practice, you can master this elegant and timeless design, making it a standout feature in your handmade creations.
Advanced Weaving Patterns
Explore intricate designs like chevron, woven flowers, and geometric shapes. These patterns add complexity and visual appeal, allowing for endless creativity and customization in your finger loom projects.
Creating a Chevron Design
The chevron design is a popular pattern in finger looming, characterized by its inverted V-shaped rows. To create this design, start by setting up your loom with an even number of warp threads. Choose two or more contrasting colors to make the chevron stand out. Begin weaving by alternating colors in a zigzag motion, ensuring each row aligns to form the V shape. Use the twill stitch to create a subtle texture that enhances the chevron’s visual appeal. Maintain consistent tension to keep the pattern sharp and symmetrical. Experiment with color combinations and spacing to achieve unique variations of this timeless design. With practice, you can master the chevron pattern and incorporate it into bracelets, scarves, or decorative items. Try pairing bold colors for a striking effect or softer tones for a subtle look.
Woven Flowers and Leaves
Adding woven flowers and leaves to your projects brings a touch of nature and elegance. Start by creating small flower motifs using the herringbone stitch for petals and the simple stitch for centers; For leaves, use the twill stitch to mimic the texture of foliage. To attach these embellishments, weave a foundation row on your loom, then secure the flowers and leaves using a yarn needle. Experiment with colors to match your project’s theme. For a realistic look, use green yarn for stems and leaves, and vibrant colors for flowers. This technique is perfect for decorating scarves, bags, or creating standalone ornaments. With patience, you can craft intricate floral patterns that add beauty to any woven item. Try layering petals for a 3D effect or combining different flower sizes for a dynamic design.
Geometric Shapes and Symmetry
Geometric shapes and symmetry add a modern, structured look to your woven projects. Use the finger loom to create patterns like diamonds, triangles, or zigzags by manipulating the warp and weft threads. Start with a simple chevron design, then progress to more complex shapes. To achieve symmetry, plan your pattern in advance and mark the center point of your warp. Use the twill or herringbone stitch to create sharp, angular lines. Experiment with color changes to emphasize geometric forms. For example, alternate colors in a zigzag pattern to create a dynamic effect. Symmetry can also be achieved by mirroring stitches on either side of the center. This technique works beautifully for scarves, belts, or wall hangings, allowing you to explore endless combinations of shape and color.

Troubleshooting Common Issues
Identify mistakes early to avoid unraveling your work. Adjust tension or stitch count if fabric feels too loose or tight. Use a needle or scissors to fix errors gently. Patience and careful observation are key to resolving common weaving issues effectively.
Fixing Uneven Tension
Uneven tension is a common issue in finger looming that can cause projects to look misshapen or loose. To fix this, start by carefully examining your warp threads to ensure they are evenly spaced and taut. If some threads are too tight or too loose, gently adjust them by pulling or slackening as needed. Use a comb or fork to align the weft threads evenly, ensuring consistent spacing. If the issue persists, consider re-warping the loom with more attention to tension. For minor adjustments, tighten or loosen specific threads rather than the entire warp. Regularly checking and adjusting tension while weaving can prevent unevenness. With practice, maintaining even tension becomes second nature, leading to professional-looking results.
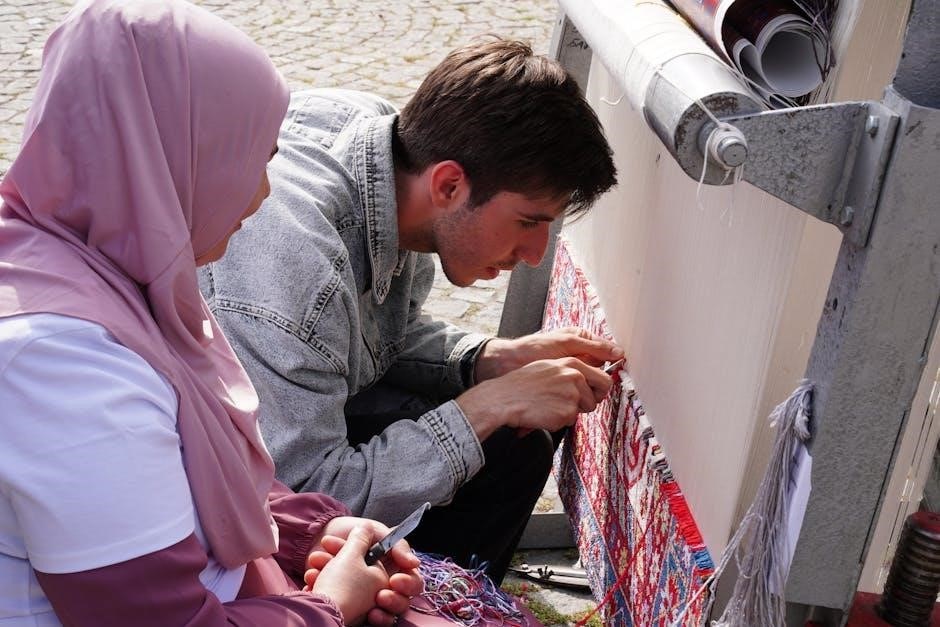
Repairing Missed Stitches
Missed stitches can occur when weaving, causing gaps or misalignment in your project. To repair them, identify the missed stitch and thread your yarn needle with the same yarn used in your project. Gently weave the needle through the warp threads where the stitch was missed, ensuring the yarn lies flat and even. This method restores the integrity of your weave without unraveling previous work. For intricate patterns, use a fine needle to blend the repair seamlessly. Regular inspection during weaving helps catch missed stitches early, making repairs easier. Consistency in your weaving motion and tension also prevents missed stitches. By addressing them promptly, you maintain a polished and professional finish in your finger loom creations.
Dealing with Frayed Threads
Frayed threads can occur when yarn ends become worn or split during weaving. To address this, gently tuck the frayed end under nearby warp threads using a yarn needle. For a more secure fix, apply a small dab of fabric sealant or clear nail polish to the frayed tip. This prevents further unraveling and keeps your project neat. If the fray is severe, carefully trim the excess yarn with sharp scissors, ensuring not to cut into the surrounding weave. Regularly inspecting your yarn ends and handling them with care can prevent fraying. Keeping a small pair of scissors and a yarn needle handy allows for quick repairs, maintaining the integrity of your finger loom project. This simple step ensures your finished piece remains durable and visually appealing.

Customizing Your Projects
Customize your finger loom creations by experimenting with vibrant colors, diverse textures, and unique embellishments. Incorporate beads, sequins, or personalized designs to make each project distinctly yours and truly special.
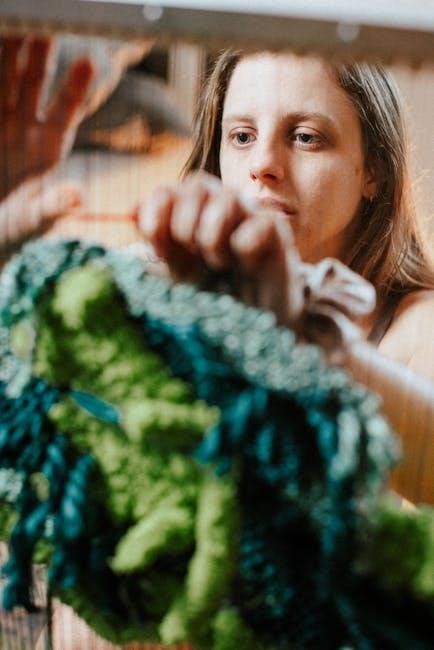
Using Different Colors and Textures
Experimenting with colors and textures adds depth and personality to your finger loom projects. Start by selecting yarns in complementary hues to create vibrant contrasts. For a subtle look, stick to monochromatic shades with varying tones. Mixing textures, like smooth cotton and chunky wool, can add visual interest. Metallic threads or glitter yarns introduce a luxurious feel, while natural fibers like hemp or bamboo offer an earthy vibe. To achieve a gradient effect, gradually transition between colors row by row. Combining soft pastels with bold brights creates a modern aesthetic, while earthy tones like olive and terracotta produce a rustic charm. Don’t hesitate to layer different yarn weights for added dimension. This versatility allows you to tailor your designs to any style or occasion, making your projects truly unique.
Adding Beads or Embellishments
Enhance your finger loom creations by incorporating beads or embellishments for a personalized touch. Start by selecting beads that complement your yarn colors and project theme. Seed beads, pony beads, or even small charms work well. Thread beads onto your yarn before weaving, spacing them evenly or clustering them for a focal point. For added sparkle, try metallic threads or sequins woven directly into the fabric. Experiment with placement—beads can highlight edges, create patterns, or form intricate designs. Secure beads by weaving tightly around them to prevent shifting. Consider adding embellishments like buttons, shells, or appliques post-weaving for extra texture and dimension. This technique allows you to transform simple woven pieces into unique, eye-catching works of art that reflect your personal style and creativity.
Creating Personalized Designs
Personalize your finger loom projects by incorporating unique designs that reflect your style or commemorate special occasions. Start by sketching your design on paper or using graph paper to map out patterns. Choose yarn colors that match your theme and experiment with techniques like stripes, gradients, or geometric shapes. For meaningful touches, weave in names, dates, or symbols using contrasting yarn. Consider adding beads or charms to highlight specific elements. To achieve intricate designs, divide your warp threads into sections and weave each part separately before combining them. Don’t hesitate to experiment with unconventional materials, like ribbon or fabric strips, for added texture. By blending creativity and precision, you can craft one-of-a-kind pieces that tell a story or celebrate a personal milestone.

Resources and Tutorials
Explore tutorials, patterns, and tips to enhance your finger looming skills. Discover detailed guides, video demonstrations, and expert advice to help you master various weaving techniques and designs.
Best YouTube Channels for Finger Loom Tutorials
YouTube offers a wealth of finger loom tutorials perfect for learners of all skill levels. Channels like Finger Loom Fun and Weave With Me provide clear, step-by-step guides for beginners. These channels cover basic stitches, warping techniques, and project ideas like bracelets and scarves. For intermediate learners, Loopy’s Looming offers advanced patterns such as chevron designs and herringbone weaves. The Weaving Wizard is another great resource, focusing on troubleshooting common issues and sharing tips for customizing projects. These channels are excellent for visual learners, offering close-up demonstrations and creative inspiration to enhance your finger looming skills. Exploring these tutorials will help you master various techniques and unlock new possibilities for your weaving projects.
Recommended Blogs for Finger Loom Patterns
For detailed finger loom patterns and creative inspiration, several blogs stand out as go-to resources. The Weaving Nook offers a wide range of free tutorials and patterns, from simple bracelets to intricate wall hangings. Loom Love specializes in modern designs, sharing step-by-step guides for geometric and chevron patterns. Fiber & Thread provides in-depth tutorials on advanced techniques like woven flowers and personalized designs. These blogs are perfect for both beginners and experienced weavers, offering tips, tricks, and inspiration to enhance your projects. They often feature user-friendly instructions and high-quality images, making it easy to follow along and master new skills. Exploring these blogs will help you discover fresh ideas and refine your finger looming craftsmanship.
Online Communities for Sharing Ideas
Online communities are a fantastic resource for finger loom enthusiasts to share ideas, learn from others, and showcase their projects. Platforms like Facebook groups, Reddit forums, and Discord servers dedicated to weaving and fiber arts offer a space to connect with fellow crafters. For example, the Finger Loom Enthusiasts group on Facebook is a vibrant community where members share tutorials, patterns, and inspiration. Similarly, r/FingerLoom on Reddit is a hub for discussing techniques, troubleshooting, and showcasing finished projects. These communities often host challenges, collaborative projects, and live Q&A sessions with experienced weavers. Joining these groups can help you stay motivated, gain feedback, and discover new ideas to enhance your finger looming journey.
Final Tips for Mastering the Finger Loom
Mastery of the finger loom requires patience, practice, and creativity. Start with simple projects to build confidence, then gradually experiment with complex patterns. Always maintain even tension to ensure your work lies flat and looks professional. Don’t be afraid to try new yarns, colors, and embellishments to add unique touches. Watching tutorials and joining online communities can inspire fresh ideas. Keep your tools organized and your workspace clean to stay focused. Most importantly, enjoy the process—every stitch is a step toward creating something truly special. With dedication, you’ll unlock endless possibilities and become a skilled finger loom artist.
Encouragement to Keep Practicing
Consistency is key to mastering the finger loom—every stitch brings you closer to creating beautiful, professional-looking projects. Celebrate each small achievement, as they build toward larger successes. Embrace mistakes as learning opportunities and remember, practice makes perfect. The more you weave, the more comfortable and creative you’ll become. Don’t hesitate to explore new techniques or patterns; they’re chances to grow. Most importantly, enjoy the journey—finger looming is not just a skill, but a relaxing and fulfilling hobby. With persistence, you’ll unlock new levels of artistry and satisfaction in your work. Keep weaving, and soon you’ll amaze yourself with what you can create!